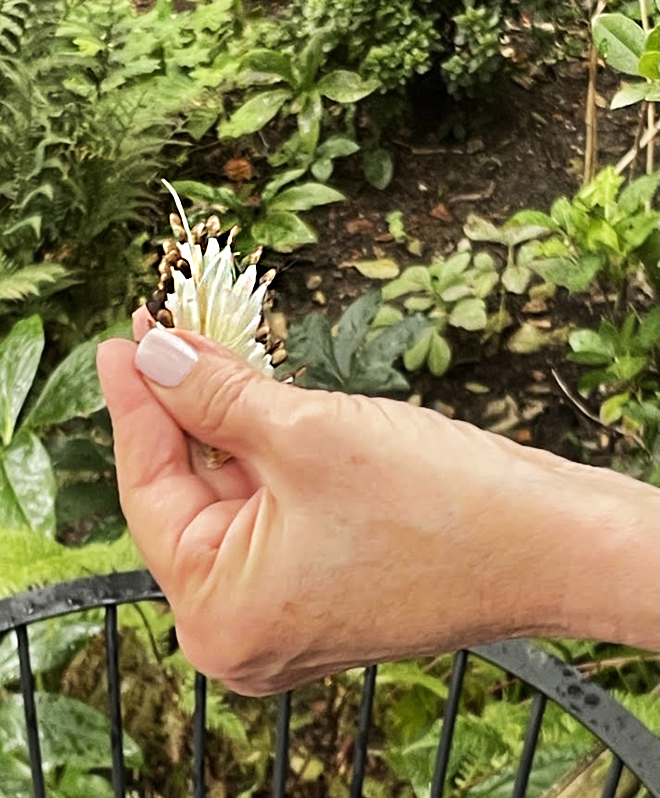
Category Archives: Horticulture

Have You Tried Growing Potatoes?

By Isa Hetzel
Garden Club member Isa Hetzel is an interior designer who lives in Hastings-on-Hudson, New York

Digging up potatoes near summer’s end is one of the most rewarding, delicious, and surprising events in gardening. It’s bit like a scavenger hunt. You never know exactly where or what you will find. It might be a bunch of little ones all together, or a nice fat golden tuber in the dark earth.

Though not commonly grown in home gardens, potatoes are among the easier vegetables to try, with good results. “Seed” potatoes, the potatoes from which a new crop is started, are often bought from nurseries online and locally. Since this year presents a particular difficulty, you can try potatoes you have on hand or buy at the grocery store. I’ve done both with success. If you google “growing potatoes,” the ‘rules’ will tell you that store-bought potatoes are sprayed with sprouting inhibitor, but it hasn’t made a difference in my experience.

So, here is what you will need:

• A bag of potatoes. I like the very small ones, no larger than an egg; organic if possible. If you have larger ones, no problem.

• A sharp knife.

• Some compost if your soil is hard like clay. Potatoes prefer loose, loamy, rich soil with very good drainage. The amount of compost you might add depends on how much amending your soil requires. I use bagged Lobster Compost from Maine. The soil where mine are planted is loamy to begin with so I don’t need to add much.

• A little organic granular fertilizer.

• A digging shovel and a trowel.

• A small plot of ground. I’ve chosen a section that gets at least 6 hours of direct sunlight every day, and measures about 7 x 3 feet. You’ll need enough space around the plot to walk around and to reach the plot to weed and to dig up the potatoes. So plan accordingly. If you are doing a larger area, you might divide the planting into two sections, a couple of rows with space in between. They will need to be watered frequently in dry weather, so keep that in mind.

Order of Things:

First, dig up the ground about 8 to 10″ deep, loosening it and turning it over. Add compost and mix it up. You might want to add a little organic granular fertilizer. Even up the surface a bit.

Next, cut each piece in about half. Make sure that each piece you plant has an ‘eye’ or two, which will be the sprouting points. If the potatoes are quite small, you can use the whole potato. If they are rather large, you might want to cut them into half or in three pieces. Each piece may produce several tuber roots, which are the potatoes.

Using the trowel, dig holes roughly 6″ deep, drop in a potato and roughly cover it with soil. Do this in rows, which will help you keep track of where you have planted them, with the potatoes about 8″ apart in all directions. Smooth the top of the soil. By planting them this deep, the tubers will develop below the soil surface and won’t be exposed to the sun, which can make them green and bitter

You can cover the rows with mulch, such as straw, which will help retain moisture and keep the light off the tubers if they get too near the surface.

If the soil is not too dry and rain is expected, you can get along without watering. They will need less water at the beginning, since they are well below the surface, and the air will be cool. The idea is keep them moist, not soaked, and don’t allow them to dry out.

Sprouts should begin to emerge in two or three weeks, depending on the temperature and weather.

Once they are up and growing, make sure they don’t dry out. Keep the weeds down, and wait. And wait some more… maybe 10 to 14 weeks from planting. A couple of weeks after the flowers come, they should be ready to dig. If you wait a bit longer, they will have grown larger and give you a bigger crop. It depends on the size you want. You can always dig up a couple to satisfy your curiosity and check the size.

Dig them, wash them off lightly, and store them in an airy bag in a cool, dry, dark spot.
Then:
• Smashed potatoes with butter and garlic?
• Late-summer potato salad with dill, sliced hardboiled eggs and mayo?
• Lightly sautéed in a spritz of olive oil?
• Smiles all around.


Filed under Horticulture, Vegetable Gardening

Deck Vegetable Garden

Wouldn’t you love some lovely little home-grown salad greens (rather than the stuff gently rotting in plastic containers?) But don’t have the space, the time, or the money for the gardening equipment displayed in catalogs and websites? Here’s a small, simple, inexpensive deck garden just about anyone can manage.

Hello. I’m Ellen Shapiro, the other horticulture co-chair of the Garden Club of Irvington. No one would put me in the same “grower” class as my co-chair Renee Shamosh. She is a master grower of vegetables (and everything else), having hybridized tomatoes, developed methods for saving seeds, and successfully grown major food crops in a plot on Irvington’s Columbia University property.

Although I loved growing vegetables in a sunny East Hampton garden years ago—it was a group project—three major problems caused my past vegetable-and-herb gardening attempts here in the Rivertowns to fail: (1) Shade (2) Critters (3) Space, lack of it. Last summer, however, a large willow tree fell down and had to be removed. With more sun this year, instead of our usual deck plantings of flowers, I decided to try vegetables in containers: salad varieties that are easy to grow and small (no peas or beans, pumpkins or squash). Here are the steps I followed, and which I hope will work for you, too:

First, there’s the issue of seeds, which are sold out almost everywhere. In early April, I placed an order with Renee’s Garden (a different Renee, this one in Boulder, CO). They eventually sent four packets and gave me a refund for the others. The Burpee seeds were selected from the rack in the local Stop & Shop, and the Hart’s seeds are from Rosedale Nursery on 9A in Hawthorne, where last week there was an excellent selection (with social-distancing measures in place).

Last Sunday, after Home Depot delivered three large bags of potting soil and one bag of seed-starting mix, we were ready to go.

First, my husband Julius and I laid down a tarp to protect the deck from spills. Then we collected and rinsed the containers: lightweight pots, window boxes, and hanging baskets that in past seasons had been used for flowers. We filled them 3/4 full of potting soil and 1/4 with seed-starting mix.

We then followed the directions on the seed packets, which generally consisted of “plant one inch apart, cover with 1/4″ to 1/2″ of fine soil, and gently tamp down.” I watered with our new lightweight, flexible ZeroG hose with Relaxed Gardener Watering Wand, which lets you make fine adjustments to get a soft spray that won’t disturb the soil or the seeds.

Now, how to remember what’s in each container? I made labels by printing the photo of the seed packets on an 8.5 x 11″ sheet of heavy card stock, cutting them out, and taping a small wooden skewer to the back of each.

Yesterday I used a mixed a capful of liquid seed-starting and transplanting fertilizer into two gallons of water and sprinkled the containers. I plan to stay equally vigilant throughout the growing season (insert smiley face here).

It’s strange to see “empty” containers, which just before Mother’s Day every year, were filled with flowers like Begonia ‘blazonry,’ my favorite for hanging baskets.

I’ll re-photograph the containers and post again in a few weeks. Let’s hope the seeds sprout “according to package directions” and that the birds and squirrels stick to their previous diet.


Filed under Horticulture, Vegetable Gardening

Now Is the Time to Start Vegetable and Herb Seeds

Right now, it seems like almost everybody in America wants to grow vegetables and avoid trips to the supermarket. Besides, there’s nothing more delicious than a tomato freshly plucked from the vine or lettuce and herbs snipped from plants growing in containers on your deck.

However, seeds can be difficult to find. One supermarket trip you might want to take is to the Stop & Shop on Route 119 in Tarrytown (wearing your mask and gloves, of course), where there is an almost-full rack of Burpee seeds.

Of course, you can also buy from many online sources. The Etsy seller SeedGeeks, in St. Louis, MO, for example, is getting multiple rave reviews for their quality and reasonably fast shipping; they have 103 different types of vegetable seeds and 30 kinds of herb seeds. (Please buy only what you need; seeds are most viable the first year.)

This is an image from the SeedGeeks.com Etsy shop. You might need to do your own research online to find a seller who has what you want in stock and can ship it in a reasonable time.

Several weeks ago, Garden Club of Irvington Horticulture Co-Chair Renee Shamosh started her seeds in compartmentalized trays filled with seed-starting mix. When they were large enough to transplant she moved them into 3-inch pots.

But it’s definitely not too late for you to get started right now! In fact, some of our members have grown great gardens starting as late as Memorial Day weekend.

These heirloom tomato seedings were grown from seeds Renee saved from tomatoes she grew last year. Many varieties of tomatoes can be grown successfully from seeds. Check the package! And always follow package directions.

In a few weeks Renee’s seedlings will be potted up into these large fiberglas containers, now awaiting planting in her backyard.

These containers, approximately 16″ across and 18″ deep, are large enough for tomatoes, which will grow to 2 to 3 feet high, depending on the variety.

“You can start tomato seeds (or purchased seedlings) directly into pots like these,” Renee advises. “Make sure your pots have drainage holes. A layer of newspaper in the bottom keeps insects from crawling inside the hole. And a layer of pebbles helps with drainage, too.”

The container on the right, which is about 14″ square, is great for lettuce and radishes, which have shallow roots.

What are you going to plant this week or weekend?

“Shallower containers are fine for cool-weather crops like lettuce, Swiss chard, and spinach,” Renee says. Why in containers and not in the ground? So they can be kept on a patio or deck, away from hungry squirrels and birds. However, if you have space directly in the ground that can be protected with fencing, go to it.

The square pot with the pebbles is now filled with regular potting mix to which seed-starting mix was added. Seeds of buttercrunch lettuce have been planted according to package directions.

Filed under Horticulture, Vegetable Gardening

How to Develop a Pollinator Victory Garden and Pollinator Pathways

Did you know that communities all over the world are making and linking pesticide-free, native-plant gardens, meadows and forests to encourage beneficial insect and bird species? Especially bees, which are dying out and so essential to our ecosystems.

And we can do this right here in the Rivertowns, beginning in our own gardens.

This free public event with Kim Eierman of EcoBeneficial® is typical of Garden Club of Irvington programming.

Kim is a well known environmental horticulturist who specializes in ecological landscapes and native plants. She teaches at the New York Botanical Garden, Brooklyn Botanic Garden, and The Native Plant Center.

Please subscribe to this site and get updates and invites to all our 2019-20 events.

Filed under Conservation, Horticulture, Irvington Garden Club Events, Rivertowns Westchester NY, Tarrytown NY, Zone 7 Native Plants, Zone III Events

Photo Review of Our Flower Show—The Sunny Side of the Hudson

The members of the Garden Club of Irvington-on-Hudson are delighted to bring you this selection of photos of our flower show at the Lyndhurst Carriage House. The theme, “On the Sunny Side of the Hudson,”celebrated the influence of Washington Irving on our Rivertowns region of New York and featured floral and horticultural exhibits inspired by characters and situations on the pages of Irving’s books.

The show was the result of two years of hard work on the part of all our members, especially show chair Barbara Defino. Here is just one of the many accolades sent to Barbara: “Dear Barbara and Members of the GC of Irvington: Congratulations on staging a beautiful flower show. The outstanding classes and excellent club participation showcased the talent within the Garden Club of Irvington. My thanks to you, and all the members of Irvington for their incredible hospitality. We truly were on the sunny side of the Hudson on May 10.”

Guests to the show, which was open to the public on May 10 and 11, were greeted with vases of cut stems set out in tables on the patio in front of the Lyndhurst Carriage House.

Inside the tent, an entire wall of tables was set up with glorious displays of blooms cut from exhibitors’ gardens that morning. All were judged for beauty, horticultural perfection and grooming. Categories included peonies, viburnums, lilacs, and rhododendrons.

The “Best in Show’ award for Horticulture went to Lydia Wallis of the Southampton (NY) Garden Club for her cut specimen of an epimedium.

At the entrance to the Carriage House, below, the Floral Design section opened in a dramatic fashion with mass arrangements of primarily yellow flowers — such as those grown at Sunnyside Cottage, Washington Irving‘s home — displayed on pedestals.

The winners in the “360 Degrees and Sunny” mass arrangement class were Libby Welch and Anna Getz of the Greenwich, CT, Garden Club

“The Book Party” class, channeling a book signing for Washington Irving’s literary friends that included sips of schnapps and games of dominoes, was the theme of the above winning table setting by Colleen Hempleman and Christina Vanderlip of the Hortulus GC. Judges and guests admired the rich, masculine color scheme and rare, deep-toned flowers.

This table setting by Renee Shamosh and Ellen Shapiro of the Garden Club of Irvington featured an arrangement of tulips, hydrangeas and wildflowers and a faux feather made from paper and wire. According to GCA rules, real feathers are not allowed, challenging all entrants in the class to devise a way to depict an appropriate 19th-century writing instrument.

A category entitled “Sleepy Hollow Awakenings” featured arrangements of flowers in bud and in full bloom, displayed in niches. This arrangement by Emily Meskat and Kristina Bicher Rye GC took first place in the class. Richard McKeon, a former GCI member, now with the Garden Club of Millbrook, created the second-place arrangement below.


“Short Stories,” miniature arrangements displayed on a mantelpiece, could not exceed five inches in height, width or depth. The winner, below, was Amy Hardis of the Little Garden Club of Rye.

Visitors to the Horticulture exhibits in the tent were treated to a lush display of exquisite plants grown over specified time periods according to strict conditions laid out in the show entry brochure, or “schedule.”

The horticultural displays included a “challenge class” of window boxes in which all the plants were to be propagated from cuttings or grown from seed. The award winners included GCI members Anne Myers and Nancy Stoer, who used unusual cultivars of coleus (above), and Veronica Gedrich, for the window box (below) filled with herbs, which the judges commended for “flavorful eating all season long.”

The window box above, with dipladenia and regal pelargoniums propagated by Renee Shamosh and Ellen Shapiro, was nearly disqualified because it included a few perennials from Ellen’s garden. Propagation by division was not included in the schedule. (Note to future exhibitors: Read the schedule extra carefully!)

The Rosie Jones award for “reflecting the spirit of growing with joy and enthusiasm” went to the above “Mother and Daughter” pair of coleus propagated by Julia Burke of Rye Garden Club.

“Rip Van Winkle” troughs could feature Alpine species or cultivars. dwarf conifers, and/or succulents owned for a minimum of three months. A special club award went to Ellen Shapiro, whose trough (below) included succulents grown from cuttings taken from her daughter-in-law’s San Francisco roof garden.

Our “Imaginary World of Rip Van Winkle and The Legend of Sleepy Hollow” children’s class, hosted in conjunction with the Irvington Public Library, displayed fairie houses made by children 8 to 12 years old. Proud exhibitors included Fitz Anderson, above, and Jordana Laks, below, with her mom, Lisa Izes.

In the “Inside Story” photography category, honors went to Susan Van Tassell of the Short Hills, NJ, Garden Club, for her macro shot of a dahlia, and Dori Ruff of GCI for her study of the inner workings of a peony.

The conservation and education exhibit by Catherine Ludden demonstrated the beauty and benefits of adding native plants to your garden — through a slide show and a 20-page handout illustrating “Plant This, Not That” plant pairs. This exhibit, designed by Ellen Shapiro, won a judge’s commendation. It included an exquisite arrangement of native plants, below, from Cathy Ludden’s garden.

A few of the 25 GCI members who organized and staged the show took a break from setting up the exhibits. Clockwise from left: Renee Shamosh, Jo Gurley, Ellen Shapiro, Harriet Kelly, Linda Azif, and Heather Kenny. Photos in this post by Steve Beech and Ellen Shapiro.


Filed under Garden Club Flower Show Categories, Horticulture, Irvington Garden Club Events, Rivertowns Westchester NY, Tarrytown NY

Fab Flower Show “On The Sunny Side of the Hudson”

washingtonirvingsbooksThrough flowers and plants — our 2017 GCA flower (and plant) show celebrated the life and work of Irvington’s own Washington Irving. All club members worked very hard on this for more than a year to make this show happen.

The floral designs, judged by an esteemed panel of experts, were:

• “360 Degrees and Sunny” — glorious mass flower arrangements featuring yellow flowers in season.
• “The Book Party” — fanciful table settings for a book-signing by none other than Washington Irving at his Sunnyside Cottage,
• “Short Stories” — tiny miniature arrangements displayed on a mantelpiece
•  “Sleepy Hollow Awakenings” — designs with some flowers in bud and others in full bloom.

The horticulture classes included displays of  “Rip Van Winkle” alpine garden troughs and “Home Grown” window boxes — and dozens and dozens of beautiful cut stems and branches of the best in local perennials and flowering shrubs and trees in season.

Visitors also delighted in a display of photographs of historic houses and gardens at rest, among other subjects. All work was done by members of our own and other Garden Club of America clubs who register via the GCA website.

A special and timely conservation exhibit demonstrated the importance of native plants in our landscapes.

The show, chaired by Barbara Defino, was free and open to the public at 2:00 pm on Wednesday, May 10, 2017, and from 10 am to 1 pm on Thursday, May 11, at the Lyndhurst Carriage House. Photos to come soon…

Common milkweed (Asclepias syriaca), a native plant that is an important food sorce for Monarch butterflies. The conservation and education exhibit will feature native plants to consider for our gardens, such as the common milkweed (Asclepias syriaca), which is an important food source for Monarch butterflies.

The conservation and education exhibit will feature native plants to consider for our gardens, such as the common milkweed (Asclepias syriaca), which is an important food source for Monarch butterflies.

Filed under Conservation, Garden Club Flower Show Categories, Horticulture, Irvington Garden Club Events, Irvington NY, Rivertowns Westchester NY, Tarrytown NY

Margaret Roach on “Nonstop Plants: A Garden for 365 Days”

The Garden Club of Irvington and the Garden Club of Dobbs Ferry recently enjoyed an illustrated lecture
by famed garden writer and designer Margaret Roach.

“Gardening is not my hobby, it is my spiritual practice and life partner,” Margaret said. After 25 years in the corporate world as garden editor at Newsday and garden editor and an editorial director at Martha Stewart Living, she chose a quieter life closer to nature in the Hudson Valley. But, lucky for us, she still gives lectures, does public-radio podcasts, gives tours of her 2.3-acre organic garden, where she grows much of her own food, and hosts the popular and information-packed website, “A Way to Garden.”

Margaret provided insights for making your garden a visual treat every day of the year, including lists of her favorite plants for all-season interest and color. To download the talk handout, please click here.

The lecture was followed by signing of her books: And I Shall Have Some Peace There and The Backyard Parables: Lessons on Gardening, and Life.

This spring, may your garden be as lovely as Margaret’s!

Filed under Horticulture, Irvington Garden Club Events, Rivertowns Westchester NY

Four Historic Hudson River Gardens, a Virtual Visit

Garden Club of Irvington members and guests recently enjoyed a slide lecture by garden historian Judith Chatfield, author of notable books about Italian gardens, who spoke about four dramatic New York properties and their gardens. If you are planning to tour the Hudson River Valley this spring or summer, here is a suggested itinerary based on points made in Judith’s talk.

Judith Chatfield, center in red sweater, with Deborah Flock and Joanna Gurley of the Garden Club of Irvington.

Judith Chatfield, center in red sweater, with Deborah Flock and Joanna Gurley of the Garden Club of Irvington.

We begin by making our way 80 miles up the Taconic Parkway to Red Hook to Annandale-on-Hudson to visit Montgomery Place, an historic estate designed for Janet Livingston Montgomery, a Revolutionary War widow. The Federal-style mansion is the last remaining of its kind in the Hudson Valley designed by architect Alexander Jackson Davis. The property — designed by Andrew Jackson Downing to be at its peak in October — includes an arboretum, woods, and orchards. It was acquired and renovated by Historic Hudson Valley in 1985 and sold to Bard College in 2015.

FAIR.MontgomerPlAerial

Aerial shot of Montgomery Place in fall

MontgomeryPlace2

Naturalistic landscape at Montgomery Place

In Hyde Park, 30 miles south of Bard via Route 9, Bellefield is an 100-year-old Beatrix Farrand garden at the Franklin D. Roosevelt Presidential Museum and Library. A prominent landscape architect in the first half of the 20th century, Farrand designed gardens for notable families and institutions, including the Rockefellers and Princeton and Yale Universities. In 1912, her cousin, Senator Thomas Newbold and his wife, Sarah, commissioned her to create the gardens at Bellefield, their 18th-century estate. Lining the grass lawn are beds of perennials selected for their soft color harmony, bloom sequence, and texture — a technique Farrand helped spearhead. This style became the standard for American garden design, replacing the practice of placing annuals in beds cut into the lawn.

Bellefield facade and perennial borders

Bellefield3

Formal gardens at Bellefield surrounded by clipped box hedges

Bellefield2

One of Bellefield’s garden rooms in spring

Leaving Bellefield, we make our way south to Cold Spring, across the Hudson from West Point, where we visit Stonecrop Gardens, originally the private garden of Frank and Anne Cabot, founders of The Garden Conservancy, the organization that hosts the Open Days tours every year. The Cabots were avid collectors of alpine plants, and finding choice selections hard to come by, started their own mail-order nursery. In the mid-1980s they engaged English horticulturist Caroline Burgess to make Stonecrop into a public garden. It now encompasses 15 varied acres of raised alpine stone beds, cliff rock gardens, woodland and water gardens, and enclosed English-style flower gardens that feature more than 50 plant families. A spectacular 2,000-square-foot conservatory housing tender specimens floats on a pond near the entry.

Stonecrop

Alpine plants drape over stone walls at Stonecrop

Stonecrop_pond_greenhouse

The ‘floating’ conservatory at Stonecrop, where seedlings are started and tender plants overwinter

Even closer to home in Garrison — less than 60 miles north of New York City — is Boscobel, a Federal-period mansion. The house was built in Montrose c. 1805 for States Morris Dyckman, who served the British army during the Revolutionary War. He died with only the foundation in place, and the project was completed by his wife, Elizabeth Corne Dyckman. Through the efforts of Westchester County citizens, the house was rescued from demolition in the 1940s, dismantled, and stored in barns until Boscobel Restoration Inc. had it rebuilt on the Garrison site. In 1959, Boscobel’s chief benefactor, Lila Acheson Wallace, hired the landscape architecture firm of Innocenti and Webel to transform the grounds into an appropriate historic setting. They implemented a Beaux-Arts and Neoclassical landscape that included allées of maples, mature shrubs and an entire apple orchard, installed to give the feeling that everything had always been there. In the 1990s, the grounds were expanded to include 29 acres of woodlands with a 1.25 mile scenic trail. Today, you can tour the house, now a museum featuring furniture and decorative arts of the Federal period, walk the trail, and explore 60 acres of grounds that feature rose and perennial gardens and magnificent views of the Hudson.

Boscobel_entrance_road

Approaching Boscobel in fall under an allée of mature trees


Filed under Conservation, Garden History and Design, Historic Preservation, Horticulture, NY and CT Public Garden Tours

GCI Big Winner in “Kaleidoscope” Flower Show

Every GCA garden club in New York state was required to enter a mixed planting in the ”Kaleidoscope” class at the GCA Annual Meeting in Rochester: Plants we’d propagated and/or grown in or our gardens composed in a 14″ terra-cotta-colored pot. Each club could choose a color scheme: yellow-orange, pink-red, or blue-purple. GCI chose blue-purple. Starting last September, we approached the project as a club, with members rooting cuttings and planting bulbs. Over the last few weeks, we combed our gardens for blue flowering plants. The harsh winter and late spring didn’t make things easy.

Renee-Anne SM

Renee Shamosh and Anne Myers in Rochester, NY, with the club’s winning container planting.

The judges awarded us a first-place blue ribbon as well as the Rosie Jones Horticulture Award, for:

“An entry of exceptional visual appeal that reflects the spirit of growing with joy and enthusiasm and inspires others to propagate, grow, show and share horticulture.”
The container planting was designed by Ellen Shapiro, Renee Shamosh and Donghai Zhen. Renee contributed phlox, streptocarpus, evolvulus, forget-me-nots, and ‘super blue’ pericallis. Ellen contributed wood hyacinths and blue chalk fingers. Club president Susan Weisenberg contributed bearded irises, the centerpiece of the arrangement. Also adding to the arrangement were plants contributed Bunny Bauer, Deb Flock, Nora Galland, Cena Hampden and Anne Myers: the Cape primrose, comfrey, dwarf blue cypress, amsonia and forget-me-nots, respectively.
The entry was accompanied by the following key card, indicating to show visitors the botanical and common names of the plants and their relative position in the container.
GCI BlueContainerKeyCard


Filed under Garden Club Flower Show Categories, Horticulture, Zone III Events

A Visit from the Expert

Beth Hickman

GCA Zone III (New York) Horticulture Representative Elizabeth D. Hickman recently spoke to our club and demonstrated how to choose, display and groom plants for horticulture exhibits at the flower shows.

Here, Beth is critiquing members’ plants, describing how they should be groomed in order to be “passed” or allowed to be displayed in the competition. For example, in addition to no evidence of insects or disease, there can be no brown edges or yellowed leaves. She noted that some of the members’ plants were imbalanced, too leggy, needed fertilization, or were displayed in containers that clashed with the plant rather than enhancing it.

She also spoke about how to cut stems for display in glass bottles. Here are her cutting and conditioning tips that will help keep plant material looking fresh after two or three days, not dried and wrinkled:

1. Cut stems in the coolest part of the day, out of direct sunlight; early in the morning or near sunset is best.
2. Cut the stems at an angle for maximum surface.
3. Split the ends of woody-stemmed flowers or branches. For flowers that bleed milky juices, like euphorbia and poppies, pass the cut end through a flame to seal the cut.
4. Make sure the bottle is filled to the top with room-temperature water (see more details in our article on cut stems under the “Horticulture Tips from GCI” tab.)

Filed under Horticulture